
This post contains affiliate links.
There are many ways to mix ingredients. Which method is best for you depends on a number of factors including what you’re making and what tools you have available at your disposal.
What is a Mixing Method in Baking?
As a general rule, a mixing method is a way to incorporate ingredients together when baking. Each mixing method yields different results, so depending on what you’re baking, it’s better to use one method rather than another.
Mixing can refer to blending, stirring, binding, beating, creaming, whipping, or folding your ingredients.
Recipes often use some of these words interchangeably, but as you will find out, they all have very distinct meanings and purposes when it comes to baking.
While it may feel nice for someone to call you “one tough cookie,” you don’t exactly want to eat one!
Listed below are 10 different mixing methods along with how and why you should do them. After learning about these various ways of mixing and what they do, hopefully, you can avoid making some of the mistakes I did during my early attempts at baking.
The 10 Different Methods of Mixing:
- The Blending Method
- The Cutting Method
- The Creaming Method
- The Whisking Method
- The Beating Method
- The Folding Method
- The Stirring Method
- The Kneading Method
- The Sifting Method
- The Roll-In Method
Although some of these mixing methods may be slightly easier to use than others, they’re all simple to master and can be perfected by any home chef. Creating a new recipe in the kitchen is always a learning experience and may take some time and maybe even a few mistakes, to get it right.
While I like to do my mixing by hand, I much rather prefer using a Stand Mixer instead. I recently wrote an article that talks about the 3 Best Stand Mixers that bakers can buy in each stage of their baking journey. After reviewing a few stand mixers, the Best Overall Mixer was the KitchenAid Artisan Tilt-Head Stand Mixer. You can check out this stand mixer on Amazon!
Learning these mixing methods has saved me so much time and effort. Keep reading to learn what each method does so that you too can utilize each one of them correctly!
1. The Blending Method
As a general rule, the blending method is used for making cakes, or other treats, that are equal parts or greater sugar to flour. This method is also commonly used when making large quantities of baked goods.
There are different ways to do the blending method, and which tool you will use to blend your ingredients is what determines which way is best for you to do.
If blending your ingredients by hand, then you can put all of your ingredients into a mixing bowl and blend them all together in a circular motion until everything is combined.
However, unless you’re up for an intense arm workout, or you don’t have a mixer, I do not recommend doing the blending method this way.
The best way to do the blending method is to use either a stand or hand mixer!
Blending your ingredients this way is faster, and you’re less likely to have ingredients that aren’t properly blended in.
To do the blending method using a mixer, I recommend separating your ingredients into two bowls and dividing them by wet and dry. Be sure to sift your dry ingredients before adding in your wet ones.
To prevent your dry ingredients from flying everywhere when you begin blending your batter, it’s imperative that you start with the settings of your mixer on low and then gradually increase its speed as your batter becomes more mixed.
Be sure to use a rubber spatula to ensure no ingredients are sticking to the bottom of the sides of your mixing bowl without being blended.
2. The Cutting Method
As a whole, the cutting method is used when making pie crusts or pastries, and this method involves making sure your fat ingredients are always solid and cold. The fat that is typically used with this method is butter.
When the cutting method is done right, it results in a light and flaky crust for pies and pastries that is still pliable enough for you to roll or shape however you need to for your desserts.
At least 20 minutes before you’re ready to make your crust, you need to place your butter in the freezer. I recommend cutting your butter into small cubes before freezing it so that you don’t waste time doing it afterward.
If you wait to cut your butter until after you’ve frozen it, then it can take a while and a lot of effort to cut your butter into the cubes necessary to do this method, and by the time you complete that step, your butter will no longer be cold and will need to go in the freezer again.
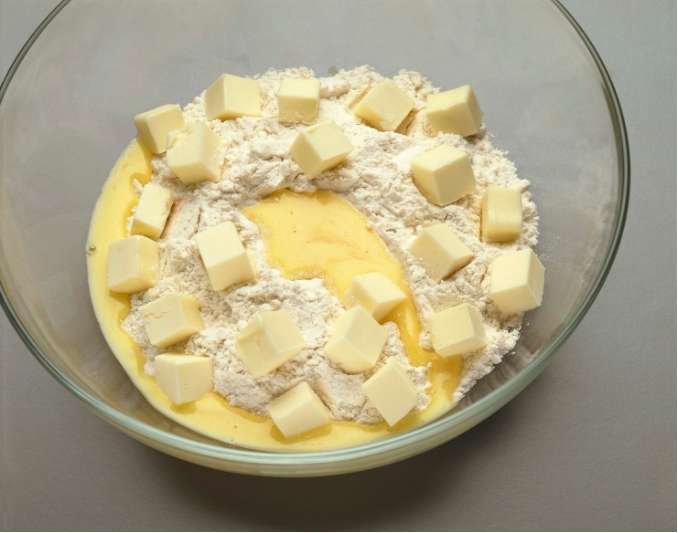
When ready, add your cold butter to your dry ingredients and combine them together until you have an almost sand-like texture. I typically prefer to do this with my hands, but you can use a processor or blender to do this as well.
If the butter begins to soften while you’re cutting it into the flour, then place your ingredients into the freezer as they are for another 10 to 15 minutes until your butter is cold and solid again. Then, continue combining everything.
When adding in your liquid ingredients, make sure they are cold to avoid warming your butter.
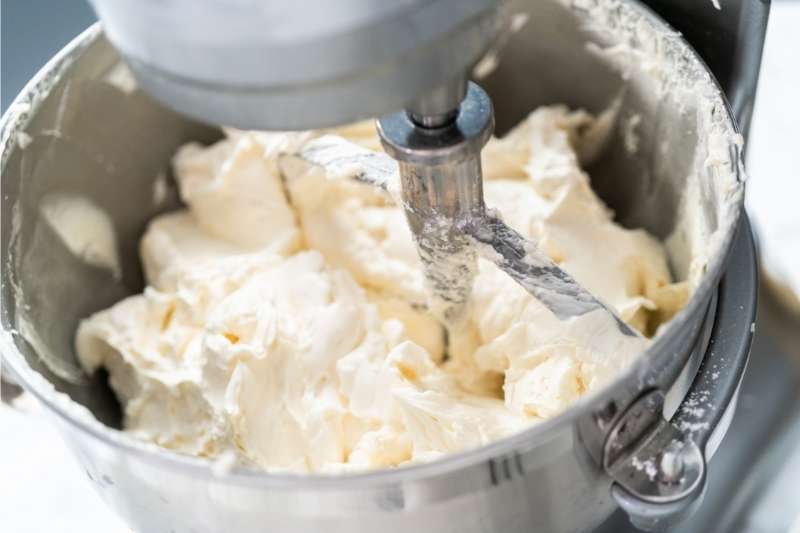
3. The Creaming Method
As a general rule, the creaming method is a technique used to mix together butter and sugar before adding the eggs. This method is often used when making cookies, and it’s also required in recipes for making some cakes as well.
When you do this method correctly, the end result yields desserts that are both light and fluffy. To do the creaming method, I typically prefer to use a stand mixer with a paddle attachment.
Add your room temperature butter and sugar into the bowl and allow the paddle to cream the ingredients for 3-4 minutes. This ensures no unwanted bits of sugar in your batter.
As you’re creaming your butter and sugar together, you should see your ingredients become lighter in color.
Unlike the cutting method, the creaming method is best done with butter that is at room temperature and is softened!
The process of creaming your butter and sugar together creates little bubbles that your leavening agents will be able to get into once they’re mixed in. The final result of your hard work will be baked goods that have a nice rise and texture.
*By the way, I recently wrote an in-depth article about The Differences Between Whisking and Whipping. This article talks about how and when to use the whisking and whipping methods. You can check out this article here!
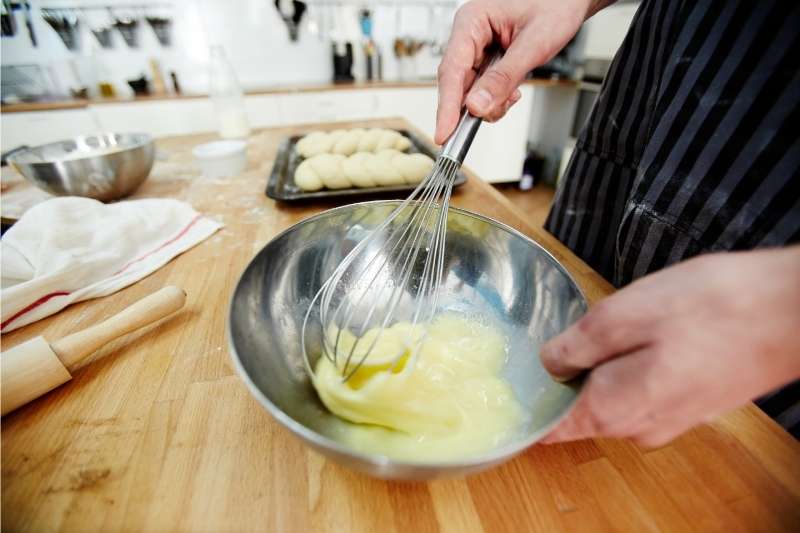
4. The Whisking Method
The whisking method is performed in order to mix ingredients with air to create a light, fluffy texture. Whisking is performed through a quick series of movements to combine ingredients and achieve proper aeration. A wire whisk is often used for the whisking method.
When whisking together wet ingredients until they grow in volume due to the whisking adding air and body into the ingredients.
The wet ingredients that you are whipping together to do this method usually consist of just eggs and sugar, however, sometimes this method is also used with heavy creams.
You can do this by either using an OXO Good Grips 11-Inch Balloon Whisk or by using a KitchenAid K45WW Wire Whisk Attachment for Tilt-Head Stand Mixer depending on whether you have a KitchenAid mixer or not. Either way you choose to whisk, you can check out both of these tools on Amazon!
When doing the whisking method, you should whisk your ingredients until they reach what is regularly called the “ribbon stage.”
This means that when you lift your whisk out of your whipped batter, your ingredients are firm yet fluid enough to form ribbon patterns by moving your whisk in a circular motion with batter hanging off of it.
Once your batter reaches this ribbon stage, then you should carefully fold your dry ingredients into your mixture being careful not to overmix your ingredients.
*Side Note: I recently wrote an article about The Differences Between Whisking and Beating. This article talks about when you are supposed to use each of these mixing methods. You can check out this article here!
5. The Beating Method
The beating method involves using a wooden spoon or spatula to firmly combine ingredients. It is a more forceful method that is performed in circular, controlled motions by scraping the bottom of the mixing bowl and turning the batter on itself multiple times.
Even if you’ve never baked before, you’re likely familiar with this mixing method if you know how to make scrambled eggs.
Since the goal is to mix the ingredients from the bottom with those from the top while moving your arm rapidly, I recommend lifting your bowl while doing this method and tilting it at an angle.
I know from experience that doing this makes it easier to reach ingredients that are on the bottom of the bowl and bring them to the top.
If you do the beating method without raising and tilting your bowl, you run the risk of not doing the proper circular motion that builds air and adds body into your mixture. The consequence of this will be a final product that isn’t as light and that doesn’t have the same sought-after texture.
This mixing method is popular with meringue and sponge cake recipes.
*By the way, I recently wrote an article about The Differences Between Whipping and Beating. This article talks about how and when to use the whipping and beating mixing methods. You can check out this article here!
6. The Folding Method
The folding method is meant to mix ingredients without deflating your batter. Using a wooden spoon or spatula, fold the lighter ingredients into the heavier ones. This mixing method is often used in combination with other ways of mixing ingredients, and it is a delicate process that takes patience.
When I use the folding method, it’s usually when making a recipe that calls for adding in whipped cream or beaten egg whites into my batter.
To do the folding method, you fold the lighter ingredients into the heavier ones rather than doing it the other way around. If you put your heavier ingredients on top of your lighter ones, you will only end up deflating your ingredients.
Rushing this method can lead to ruined desserts.
*By the way, if you’re looking for a new set of wooden spoons, I use the OXO Good Grips 3-Piece Wooden Spoon Set that has lasted me for a long time. You can check out this wooden spoon set on Amazon!
The folding method is a way to add in light and airy ingredients, like egg whites that you’ve beaten to stiff peaks, without sacrificing the nice air that you whipped into them to make your cake fluffier.
It’s important to avoid overmixing your ingredients when doing the folding method so that your ingredients don’t lose too much volume.
7. The Stirring Method
As a general rule, the stirring method is best to use when you just need to mix your ingredients together without having to worry about incorporating air or preserving volume. This is the simplest mixing method and the one you’ve likely done most. It is also called the all-in-one method.
I typically mix my ingredients this way whenever I’m making pancakes or waffles. It’s rare that you’ll use this mixing method for a cake recipe or when making most desserts.
This mixing method is usually the simplest to do since you don’t have to think which ingredient should go in the mixture first!
*By the way, you might also want to know How To Mix Batter Without a Mixer. I recently wrote an article talking about The Right Ways of Mixing Batter By Hand, which you can check out here!
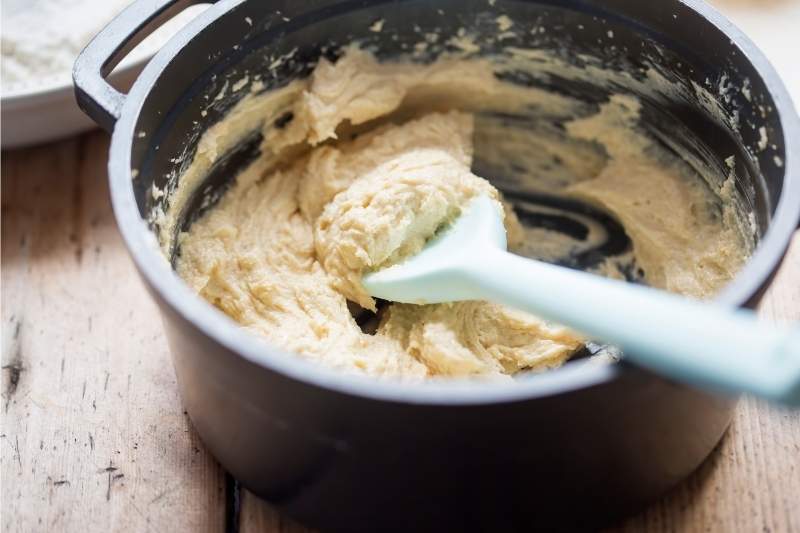
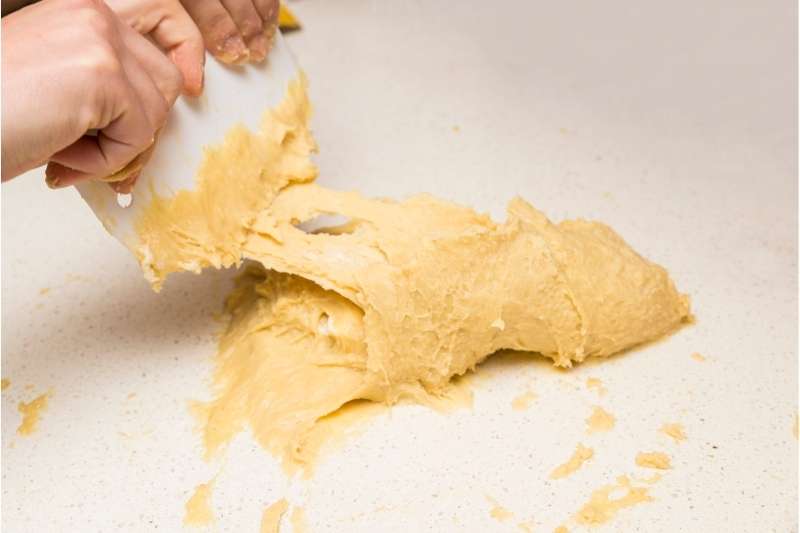
8. The Kneading Method
The kneading method is typically used to make doughs. This method could be done by hand or a stand mixer. It is mostly used for making bread and pizza recipes, and the process is done to strengthen the gluten in the dough and ensure an even temperature of your dough.
To knead dough is to massage it before baking it. You can knead the dough with your hands or with a dough hook attachment in a stand mixer.
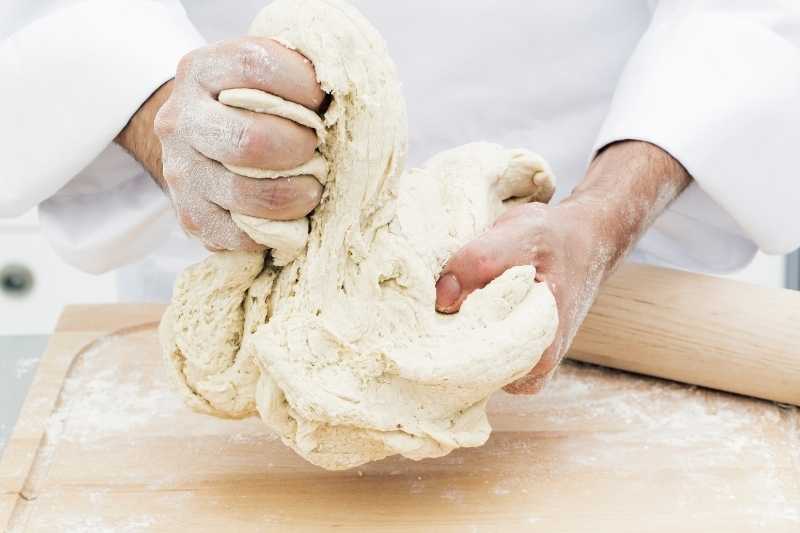
I prefer doing this method by hand since you can control the ingredients inside the bowl for all of them to mix properly. I usually scoop the sides of the bowl into the mixture to get everything into the dough.
Kneading dough with your hands also helps with proper yeast distribution.
While most stand mixers have different speed controls, I found that kneading the dough by hand will allow the gluten in the dough to strengthen better.
9. The Sifting Method
As a general rule, the sifting method is meant to break up lumps in your flour or other dry goods. This method helps properly mix dry ingredients together. It is also a great way to prevent an uneven distribution of ingredients throughout your batter.
Once your dry ingredients are well sifted together, you can then combine them with your wet ingredients using your mixing method of choice, and you can continue on with the rest of your recipe.
While some people might think that this is not a mixing method, I have to disagree. Sifting different types of dry ingredients together is the best way to mix them up well. Doing this has saved me so much energy trying to mix in clumpy dry ingredients into the wet ingredients mixture!
The best tool that I’ve found to sift my flour is a Battery Operated Electric Flour Sifter For Baking. This wonderful tool automates all of my sifting needs in the kitchen! It has a 4-cup capacity and is washable. What else do you need in an automatic sifter? You can check out this Electric Flour Sifter on Amazon!
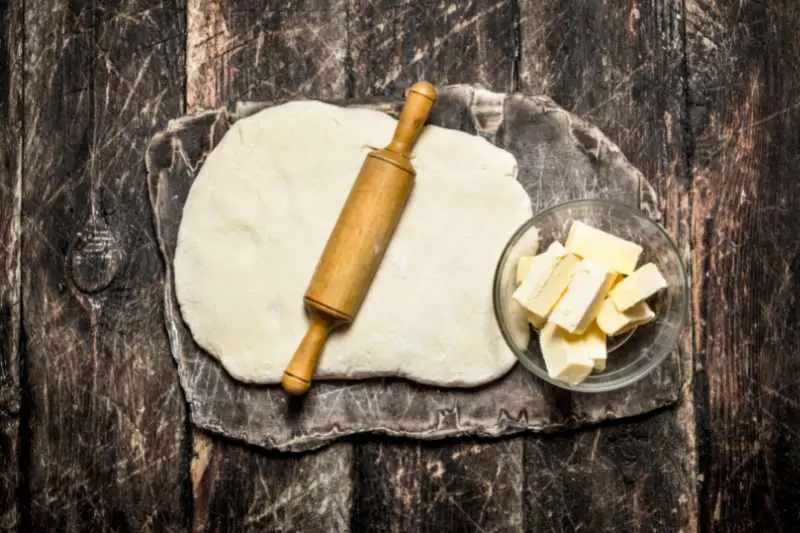
10. The Roll-In Method
As a general rule, the roll-in method is used to make treats like puff pastries, danishes, and croissants. To do the roll-in method, you roll (or fold) butter into your dough to increase the volume of the mixture. This process is also called lamination.
Making laminated dough via the roll-in method serves to increase the volume of your dough as it’s baking thanks to the steam that’s created from the butter inside of it melting.
When the roll-in method is done properly, it can make the volume of your dough seven times bigger.
For this, I usually use a Classic Wooden Rolling Pin. I came across this rolling pin on Amazon and it works great for all my rolling needs since the handles stay in place when you roll it. This makes it so much easier to roll the pin!
What is the Importance of Using Different Mixing Techniques in Baking?
The importance of using different mixing techniques when baking is to ensure you’re creating the best texture for your baked goods. Some baked goods require being light and fluffy like a chiffon cake, or flaky like a homemade pie crust, while others need extra volume and to rise like pizzas.
Using different mixing techniques ensures each of these various needs are met.
*Side Note: I recently wrote an article about The 5 Main Methods of Baking. This article talks about how and when to use each baking method when making your baked goods. You can check out this article here!
What Are The 4 Main Methods of Mixing?
The four main methods of mixing are blending, kneading, folding, and creaming. These four methods are the most essential methods to know when baking because they will allow any baker to have the most variety of skills needed for mixing any baked good.
Final Thoughts
When you’re a beginner baker, there are some things you find yourself learning about the hard way, and that typically happens when something you’ve tried to make goes wrong.
I’ve had this experience myself more than a few times. As frustrating as it can be in the moment after some time passes, I’m always just as grateful for the lessons I end up learning.
My understanding of the importance of these mixing methods came about because of one of these frustrating baking experiences. I hope this article helped you understand which mixing method you need to use while baking!