
This post contains affiliate links.
Decorating a cheesecake with different fruit can be quite challenging when you’ve never done it before. I had to learn the hard way when my fruit colors started bleeding right into my cheesecake. I started asking myself: What’s the best way to decorate the cheesecake with fruit? How can I arrange fruit on my cheesecake in a pretty way? What fruit can I use to decorate my cheesecake?
- Choose the fruit that’s right for your cheesecake
- Dry the fruit on a windowsill or with a paper towel to avoid staining
- Keep your fruit stable by firming up the cheesecake in the fridge for 30 minutes
- Arrange the fruit in a pattern for aesthetics
- Enjoy your fruity cheesecake!
You have so many decorating options when using fruit on your cheesecake. While digging deeper into these methods, I found out many things that I can do to present my cheesecake in a beautiful and delicate manner. These are the things that you must know when decorating your cheesecake with fruit.
How To Choose & Arrange The Right Fruit For Your Cheesecake!
There is such a large variety of fruit in the world that could dress up any boring cheesecake. But you need to be careful with the different kinds of fruit you can use. I mean, tomato is technically a fruit, right?
If you’re looking to bake different-sized cheesecakes, I found the perfect 3 piece set of Springform Pans that I recently got for myself! This 3-piece set comes with 4, 7, and 9-inch Nonstick Springform Pans, which you can check out on Amazon!
Decorating a cheesecake is simple no matter what fruit you’re using!
You have the option to keep them whole and decorate them around the perimeter of the cheesecake (placed upside down). You can also cut them up into thin layers lengthwise and arrange them flat on the surface of the cheesecake.
Decorating a cheesecake with fruit is more than just for flavor purposes. People love to eat with their eyes as well as their taste buds so it’s great to choose an array of fruit so that the colors pop.
Here are some different kinds of fruit with different colors to help elevate your cake!
| Red | Blue | Green | Yellow | Orange |
| Strawberries | Blueberries | Kiwi | Lemons | Oranges |
| Raspberries | Concord Grapes | Mint Leaves | Pineapples | Papaya |
Now don’t be shy and use any combination you like! I personally like to add strawberries, blueberries, a few mint leaves for a pop of green, and then some homemade candied lemons for a refreshing look.
Keep in mind that if you’re putting a layer of syrup or jam on top of your cake, you’ll want to match the fruit with the flavoring of your syrup. For instance, I usually put a thin layer of strawberry jam that I make on top of my cake. For decoration, I keep it simple with strawberries and some mint leaves for a pop of green against all of the red.
When I have many guests come over and one cheesecake isn’t enough, I turn my cheesecake into mini cheesecake bites in many different shapes! My guests love my mini cheesecake bites and always ask me how I made them. Go to my article here where I quickly explain how to turn your cheesecake into mini cheesecake bites!
Arranging Your Fruit:
Now comes the fun part: arranging your fruit. There is always something aesthetically pleasing about symmetry. We tend to find patterns in decorations which is why the most beautiful cakes have a specific way to arrange their fruit.
So what do I mean about symmetry? Well here are some options I usually turn to for my decorating:
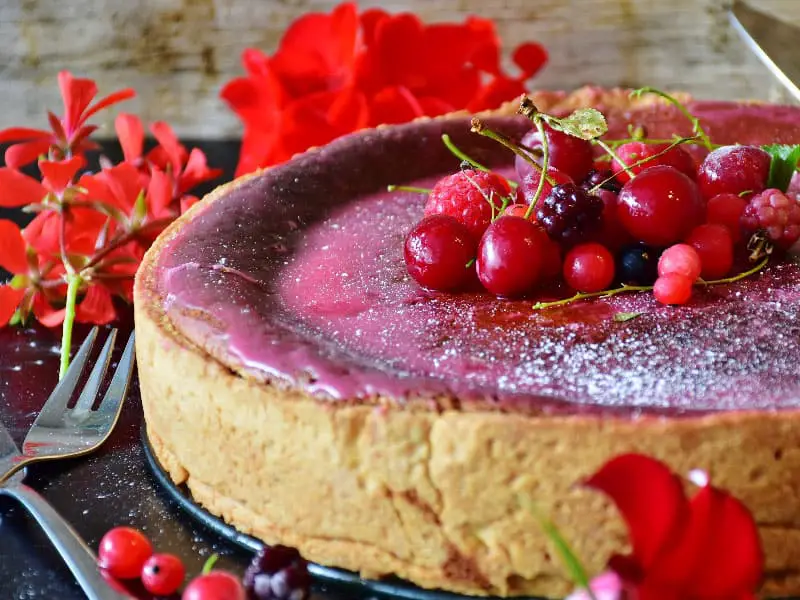
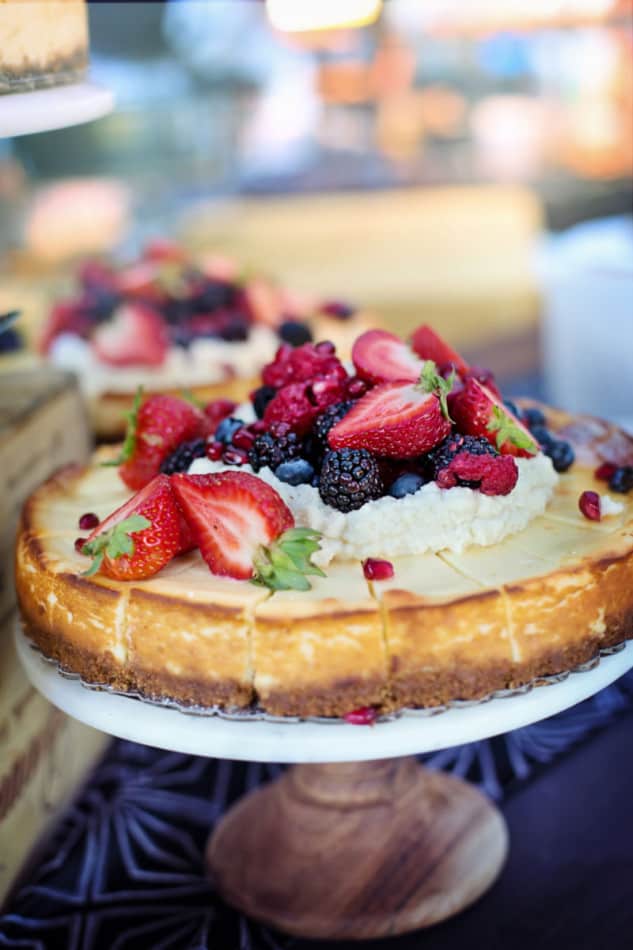
- Directly in the Middle: Organizing the fruit right in the middle in a circular fashion highlights the general shape of the cake
- Wrapped Around the Perimeter: This is a nice touch; each person you serve a slice of cheesecake to will have an equal amount of fruit
- The Semi-Circle: This method gives you an elegant finish to your cake You choose only half of the cake and decorate that section alone
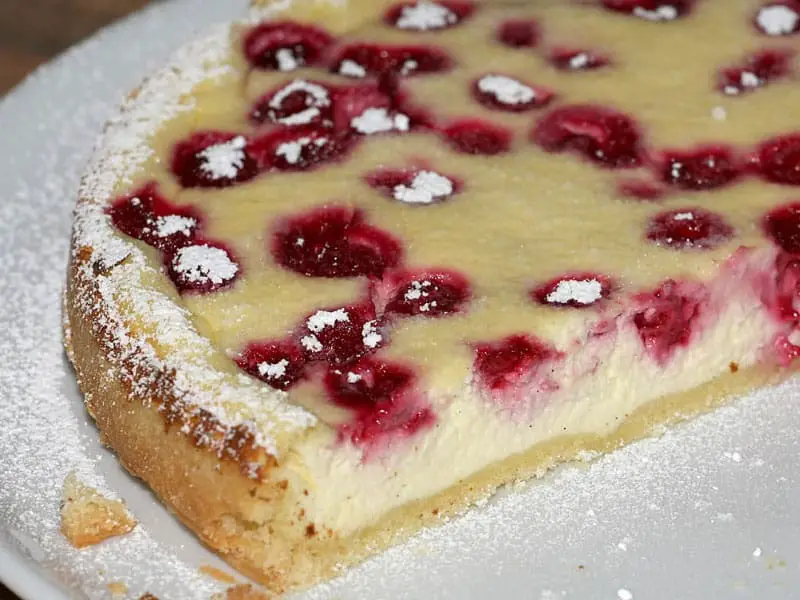
- The Entire Cake: Go all out and layer your fruit across the entire surface of your cake
Whichever option you use to arrange the fruit that you chose, I promise that your cheesecake is gonna look much prettier than ever before. Having different fruit on your cheesecake will definitely activate your guest’s salivary glands.
*By the way, if you want to learn How to Travel With Your Cheesecake Safely so that it doesn’t fall apart, I recently wrote about it in my article that you can find here!
Here’s a video showing you how to make a Berry Topped Cheesecake:
Important Steps To Know Before Decorating Your Cheesecake With Fruit!
Baking and decorating are all about trial and error. It took me dozens of tries to get the fruit just right on my cheesecake. In the very beginning, I found out the hard way that fruit can actually bleed onto your cheesecake creating an unprofessional-looking cake if not eaten right away!
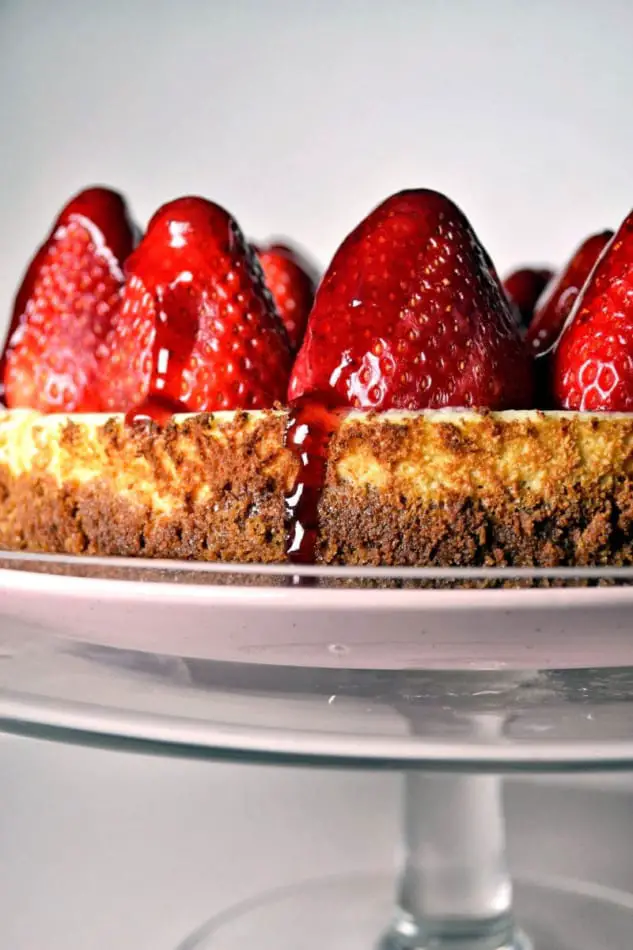
One of the most well-known pairings of fruit and cheesecake is without a doubt, strawberries. It’s so refreshing in contrast to the richness! The problem is that your strawberries can betray you and seep its red color onto the surface of your cheesecake.
This poses a problem because it just makes your cheesecake look very messy! The most important thing you can do is properly dry your fruit.
Dry Your Fruit:
You CANNOT skip this step in the decorating process if you’re trying to impress your friends and family with an aesthetically pleasing cheesecake. You have two options:
- Option 1: After thoroughly washing your fruit, place a layer of towel and paper towel on your sunny windowsill and allow the fruit to dry for at least 1 hour
- Option 2: Simply tap dry your fruit, careful not to squeeze or break them, until they are dry to the touch
I personally like using a mixture of both methods. I tap dry the fruit and leave them out on my windowsill for an hour to ensure that they are completely dry. Try out both options and see which works best for you!
Now that our fruits are nice and dry, we can go ahead and place them on the cheesecake right? Well, not exactly.
Keep Your Fruit Stable:
You have to know when to place the fruit onto the cheesecake. I had an instance where I quickly decorated the cake as my guests came and when I hurried over to serve it, I slightly tripped, (the cheesecake was fine, I was fine) but all my fruit toppings toppled over and fell!
It was so embarrassing. So I realized that I needed to do something to avoid this mistake in the future. I needed to do something creative in order to prevent my fruit from toppling over the cheesecake.
Any recipe calls for the setting of a cheesecake. Usually, the cheesecake goes into the fridge for about four hours and even overnight to properly set. Do not wait for your cheesecake to be fully set when you want to put your fruit on top.
Follow your cheesecake recipe as you normally would, allowing it to cool down first at room temperature. Place the cheesecake into the fridge for only 30 minutes. At this stage, the cheesecake has just begun setting but is still soft enough for us to continue with our decorating.
Arrange your fruit on top of the cheesecake at this point. When you are done, place the cheesecake back into the fridge and continue setting it according to the recipe.
The consistency of the cheesecake will hold the fruit in its place. As it continues to set in the fridge, the fruit will set along with the cheesecake to ensure its held in place.
Use Some Whipped Cream:
Another simple way to keep your fruit from falling over is by using a little bit of frosting or whipped cream. I generally use whipped cream because frosting might be too overpowering for the cake.
Before you get to put whipped cream as a topping, I would suggest you cut your cheesecake. Cutting your cheesecake can be an annoyance when you’re not doing it the proper way. Read my article here where I quickly explain the best methods of cutting the perfect cheesecake slice!
Create a whip cream base for your fruit!
Whipped cream can even be used as part of your decoration. You can make small dollops of whipped cream on your cheesecake and place your fruit on them. Another way you can decorate is by arranging your fruit in the way you want and place the dollops of whipped cream around them.
To Summarize…
Learning how to properly decorate my cheesecake with fruit has saved me on many occasions. Serving up a beautiful cheesecake to your guests is always much preferred over a plain undecorated cake. Don’t get me wrong, I love a plain slice of cheesecake myself on occasion. However, serving up your delicate creation to your friends, family or guests is always better with a little personality in the form of fruit.