
This post contains affiliate links.
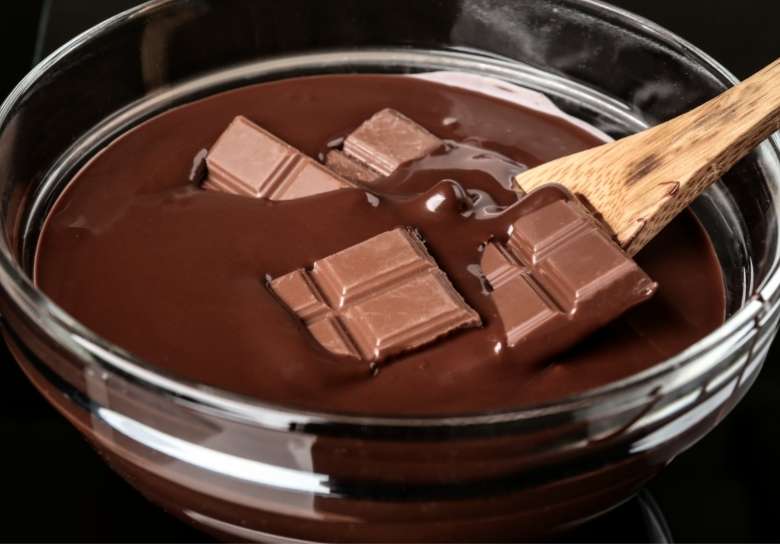
One of the greatest creations on the planet is by far chocolate. The applications of chocolate are limitless and can be used in many different forms. One of my personal favorite ways to use chocolate is melting it and dipping fruits into it. The very first time I melted chocolate, I learned the hard way that chocolate can burn and seize. It took me many attempts to perfect the methods of properly melting chocolate without burning it.
As a general rule, chocolate should not be heated with direct heat. Melting chocolate should be done in intervals with a double boiler or a microwave. This ensures the prevention of burning the chocolate as well as achieving the correct consistency.
I was devastated when I saw my chocolate turn more solid rather than melt into the liquid gold that it should be! I spent a lot of time perfecting different methods to make sure that melting chocolate does not turn into burning chocolate.
Methods for Melting Chocolate
When I first thought about melting chocolate, I decided to stick some chocolate in the microwave and melt it there. As I removed it from the microwave, my chocolate turned into a giant chunky mess that was beyond melting. Devastated, I realized I wouldn’t be making my favorite chocolate-covered strawberries any time soon!
There are, in fact, more than one way to melt chocolate successfully without burning chocolate:
- Microwave Method
- Double Boiler Method
- Water Bath Method
- Slow cooker Method
- Sandwich Bag Method
These methods are a foolproof way to get one step closer to melting chocolate without burning.
| Method | Usage |
|---|---|
| Microwave Method | Great for adding to batter or dipping fruits |
| Double Boiler Method | Less risk of overheating, adds shine to the chocolate |
| Water Bath Method | Hands-off method, best for setting up in advance |
| Slow Cooker Method | Great for a large quantity of chocolate or a fondue night |
| Sandwich Bag Method | Perfect for drizzling decor onto baked goods and strawberries |
*By the way, you might also want to know How To Store Melted Chocolate To Make It Last. I recently wrote an article that talks about The Best Way To Store Melted Chocolate, which you can check out here!
1. Microwave Method
One of the simplest tools that are accessible to many people is a microwave. We use microwaves almost every day to warm up food so why not use it to melt chocolate?
Even though this method is the simplest, it could also be the trickiest
It is very easy for chocolate to burn in the microwave. The key behind melting in the microwave is to do it in intervals with small pieces. Here are the steps for easy melting:
- Chop the chocolate into small pieces
- Place chocolate pieces into a glass bowl
- Place the glass bowl with chocolate into the microwave
- Set the microwave to 2 minutes
- Take out a bowl and mix chocolate
- Place bowl back into the microwave
- Set the microwave to 30 seconds
- Take out the bowl and mix chocolate
- Repeat steps 7 & 8 until chocolate is almost melted
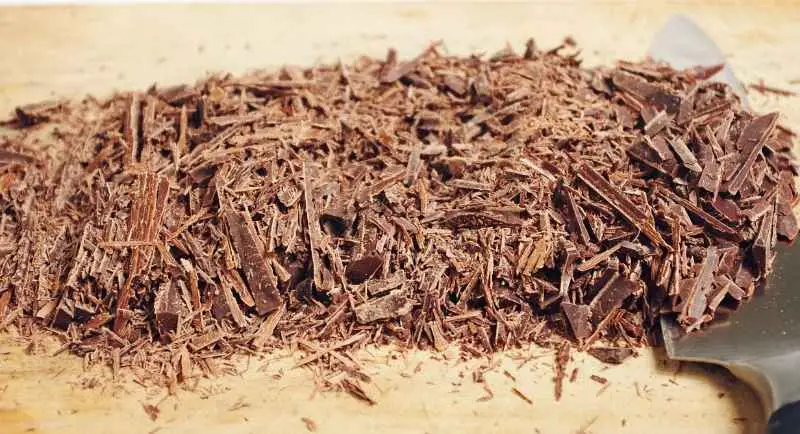
Chopping up your chocolate before melting ensures that the chocolate melts faster and prevents any clumping that could lead to burning. I found that using a larger chef’s knife makes it easy to chop the chocolate!
Using the right bowl is also important when using the microwave. I have experimented with a few kinds and I have found that using a glass bowl helps melt the chocolate evenly. Make sure the glass bowl you use is tempered and heat-safe!
I would’ve assumed that using a stove would be the reason I burned my chocolate. When I first used a microwave for melting, I instantly burned my chocolate!
This made me realize that chocolate needs to be melted in intervals in the microwave.
When you place the bowl in the microwave, start off with just 2 minutes. This will begin the heating process of the chocolate without giving it a chance to burn. After 2 minutes, take out the bowl and mix the chocolate. I found that using a wooden spoon or a rubber spatula works best!
From this point, only microwave in 20-30 second intervals!
With every interval, mix the chocolate for even melting. If the chocolate is not melted in intervals, it begins to clump up and burn!
*By the way, you also might want to see an in-depth article about Creative Things To Do With Leftover Melted Chocolate. I recently wrote this article breaking down all the ways to Use Leftover Melted Chocolate, which you can check out here!
Don’t heat the chocolate until it is fully melted! Stop heating the chocolate once it is almost completely melted with small solid pieces left. The next interval might burn the liquid portion of the chocolate. Instead, the residual heat from the liquid chocolate will melt the remaining solid pieces.
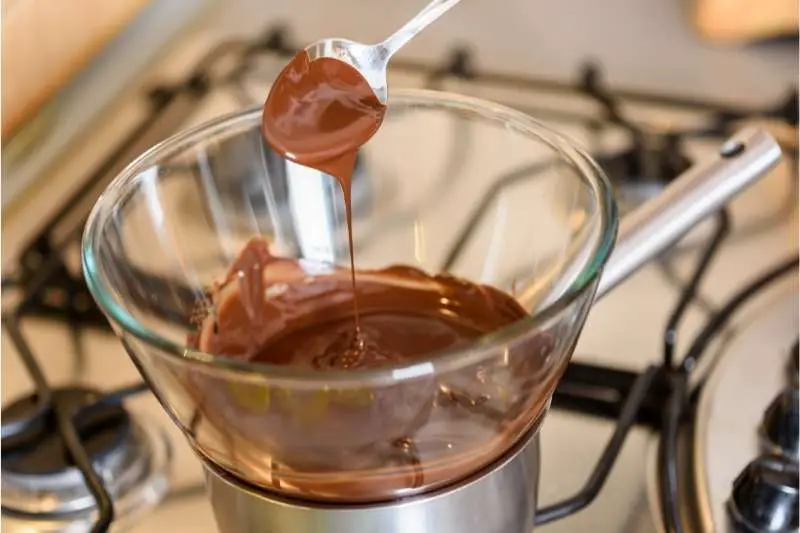
2. Stovetop/Double Boiler Method
The stovetop method is my go-to method when melting chocolate. It makes me feel like a chocolatier running my own chocolate factory! The smell that comes out from melting chocolate on the stovetop tests my ability to not consume the whole thing that very moment!
As a whole, melting chocolate on the stovetop is the same as using the double boiler method. Set up a pot of lightly simmering water and place a heat-safe bowl on it. Make sure the water isn’t touching the bowl. Add roughly chopped chocolate into a bowl and stir to melt.
*By the way, the Double Boiler works great when you’re trying to melt something like chocolate while heating up other ingredients. I recently wrote an article that gives a breakdown of the 3 Best Double Boilers that people use in each stage of their baking journey.
After reviewing these double boilers, the Best Overall Double Boiler was the Stainless Series 2-Quart Covered Double Boiler which worked great for the dessert needs in my kitchen. You can check out this Double Boiler on Amazon!
The stovetop, or double boiler method, is the most commonly used method. It is quite simple to set up a double boiler system at home even if you do not have one.
- Set up a deep pot on the stove
- Fill 1/4 of the way with water
- Allow water to come to a boil
- Reduce heat to a gentle simmer
- Place a heat-safe bowl on top of the pot
This is a great and simple way to make your own double boiler system!
Make sure that the bottom of the bowl does not touch the water. You can use a heat-safe glass bowl but I found that stainless steel bowls work best for this method.
Once you have a system set up on your stovetop, roughly chop your chocolate and place it into the bowl. This can be done by placing the unwrapped chocolate onto a cutting board and coarsely chopping it with a chef’s knife.
Roughly chopping chocolate helps to speed up the process as well as evenly melt the chocolate.
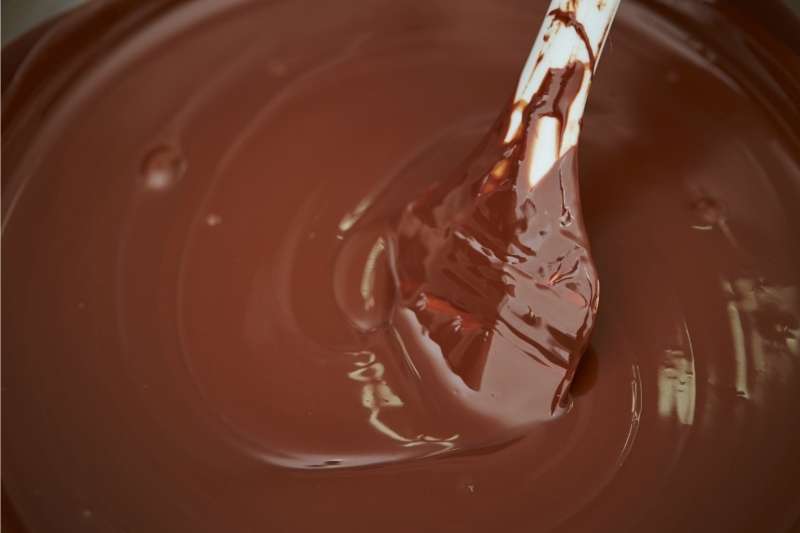
Once the chocolate is in the bowl, mix the chocolate slowly until fully melted. I personally love to use heat-safe rubber spatulas for this part. If you use metal or wooden spoons, the chocolate will cling to it.
Rubber spatulas are also great for scraping any chocolate stuck to the top parts of the bowl. It also enhances your chocolatier experience by folding the chocolate in on itself as if it truly were liquid gold!
Once the chocolate has melted completely, remove the bowl (using oven mitts since the bowl is hot!) and place it onto a paper towel or kitchen towel to avoid the spread of condensation.
3. Water Bath Method
There are times where I know I’ll be short on time. The luxury of standing by and mixing my melting chocolate disappears because I just have too much to do! Luckily, water baths are here to the rescue!
As a whole, water baths are a way to melt chocolate in advance by using a slow cooker. The slow cooker is filled 1/3 of the way with water on high heat without a lid. Chopped chocolate pieces are placed in heat-safe jars such as ramekins or mason jars. This method takes about 30 minutes.
I love using this method when I’m in a rush! While I have a few errands to do around the house, I quickly set up my water bath. Once I’m finished, I come back to beautifully melted chocolate!
Using a slow cooker is a great way to regulate and maintain constant heat.
Add hot water to the slow cooker. Make sure it is not boiling because it can splash into your chocolate which will make it seize! You do not want it to overfill and threaten to pour into your chocolate which is why you should only pour water 1/3 of the way up.
There are different kinds of vessels that can be used to place into the slow cooker. After a few trials, I found that mason jars were great because they withstood the heat and could fit a lot of chocolate pieces. Porcelain ramekins also proved to be a good choice but their wide tops are a small risk for water to enter.
Set the slow cooker to high and DO NOT use the lid!
If you close the lid on the slow cooker while the chocolate is inside, the condensation that forms on the lid will drip into the vessels which will cause your chocolate to seize.
*Side Note: You might also want to know How To Bake A Cake In A Water Bath. I recently wrote an article about The Do’s and Dont’s of Baking A Cake In A Water Bath. You can find this article here!
4. Slow Cooker Method
Slow cookers are such great items to have in the house! Besides being a time-saver when it comes to making dinner, it has helped me melt huge batches of chocolate! I usually do this when I’m hosting my fondue nights. I invited family and friends for a fun-filled night of dipping wonderful treats into delectable chocolate!
As a general rule, melting chocolate in a slow cooker is great for large batches. Add coarsely chopped chocolate directly into the slow cooker and set it to high for 1 hour. After an hour, close the lid and decrease the heat to low, and mix every 15 minutes until melted.
Large batches don’t have to be only for fun fondue nights, it’s a great way to have a large amount of melted chocolate! Setting this up ahead of time is great if you’re having a busy day.

*By the way, I have been trying to find a great Slow Cooker for all of my kitchen needs and I recently came across an 8 Quart Programmable Crock-Pot Slow Cooker with Digital Countdown Timer that worked great for me! You can check out this Slow Cooker on Amazon!
If your chocolate is melted but you still don’t need to use it, you can keep it on the “keep warm” option.
As with all the other methods, roughly chopping your chocolate before melting helps the process tremendously. Set the slow cooker on high and add your chopped chocolate. Leave it uncovered for an hour while it melts.
Putting the lid on while the heat is on high can potentially cause condensation to form and seize your chocolate.
After the hour has passed, lower the heat to low and mix the chocolate with either a wooden spoon or a rubber spatula. This will help break up any large chunks of chocolate that have yet to melt. Cover the lid and let sit on low heat while mixing every 15 minutes until fully melted.
5. Sandwich Bag Method
One of the most tedious things when decorating with chocolate is trying to shove the melted gooiness into piping bags to make designs! It’s a huge hassle and makes an even bigger mess! Luckily I found a way to cut both the time and mess down with this sandwich bag method.
As a whole, you can melt chocolate inside sandwich bags in a water bath. With a proper seal on the plastic bag, immerse the chunks of chocolate inside of the bag into a pot of hot water. Once done, cut a small hole in the corner of the bag and pipe the chocolate onto your desserts.
In my opinion, this method is life-changing because of a few reasons:
- Chocolate is melted within a vessel that can be thrown out
- Only two items are needed to accomplish this methodology
- Once melted, chocolate can be dispensed directly from the bag
- Lowest risk of chocolate seizing or burning because it sits in a water bath
It is also one of the easiest methods! However, I would only use this method if I’m planning on using the chocolate as a decoration and NOT for dipping.
Start off by setting up a pot or a bowl of hot water. I usually turn on my kettle to boil some water and then pour it into the bowl. I wait 15 minutes for it to cool slightly so that it won’t penetrate the plastic when melting.
While I wait for the water to cool for a few minutes, I roughly chop my chocolate and place it into a sandwich bag. You can use any kind of storage or freezer bag that has proper sealing.
I feel most comfortable using 2 bags to ensure no water seeps through accidentally.
Making sure no water can enter the bag, immerse the bag of chocolate into the hot water and let sit. The chocolate will start to melt quickly but let it sit for at least 20 minutes. If it is not fully melted within 20 minutes, carefully pick up the bag, mix the chocolate around by giving the bag a few gentle squeezes.
Adding half a cup of hot water after the 20 minutes will help increase the water temperature.
*Important Note: Make sure you wipe down the bag from any moisture once completed. Any water that is exposed to chocolate will ruin the texture and cause it to seize. Take a paper towel or a kitchen towel and thoroughly dry the sandwich bag before piping.
Once the chocolate is fully melted, the fun part officially starts! If you want to decorate your desserts with thin streaks of design such as letters or swirls, cut a very small part off the corner of the bag. I truly mean a tiny cut, one that you’ll barely be able to see.
For bigger decorations including filling the insides of cupcakes or just covering the surface area of a cake, cut a significant chunk off of the corner, about 1/2 in deep for easy piping.
Why does my chocolate seize?
As a general rule, chocolate seizes for two reasons: contact with moisture or overheating. When water makes contact with melting chocolate, the solid ingredients of chocolate turn into a paste which prevents further melting. This is the same with overheating chocolate which results in clumping.
In order to understand why chocolate seizes, we must understand what chocolate is made of. Chocolate has two parts to it, the dry bits (which is sugar and cocoa) and the fats (from naturally occurring cocoa butter).
When melting chocolate, any contact with water will mix with the dry ingredients and form a paste-like texture.
*By the way, you might also want to know The 5 Best Ways To Temper Chocolate Correctly. I recently wrote a full step-by-step article about tempering chocolate correctly without burning it! You can check out this article here!
We all know that adding water to ingredients like flour will turn into a pasty texture.
The water also combines with the sugar in the chocolate which results in a combination of sugar, heat, and water. These are the 3 pillars of any syrup. At this point, the syrup inside of the melting chocolate will attract the dry particles of cocoa which will give that gritty texture and appearance.
Another way chocolate may seize is too much heat! When exposed to a high amount of heat, the chocolate will become thick and lumpy and will cease to melt further. This is why, with all previously mentioned methods, the amount of heat exposure is minimal, there is lots of stirring, and even intervals of heating and cooling.
To Summarize…
Chocolate is the liquid gold of the baking world. Whether it is used as an additive in batter or for decoration, one of the basic skills in the kitchen is to know how to properly melt chocolate.
There are multiple methods to help melt chocolate the proper way without causing it to seize. Whichever method you choose, you will have perfect liquid gold every time!