
This post contains affiliate links.
Understanding how to grease a glass pan correctly has been an important aspect of my baking journey. There were many times when I took my glass pan out of the oven and wondered: What is the right way to grease a glass pan? How will it help me improve my baking?
How to grease a glass pan? Use butter, ghee, or veg shortening. Apply onto the entire surface of the glassware with your fingertips. Pour flour on the greased butter and spread it all over by patting the pan. Spill the excess out. Cut parchment paper to fit the bottom of the pan and place it inside to ensure a non-stick cake.
No matter what you decide to bake, greasing the pan will always be the most important step of the baking process. If your cake sticks to the pan, all your hard work was for nothing. Glass pans are very different compared to all the other bakeware out there. That’s why it is very important to get all the greasing steps correct.
If you need to make a dessert that is high in sugar and high in fat, a basic baking spray won’t work. These types of desserts require more effort to eventually successfully retrieve them out of your glass pan.
Use Butter, Ghee or Vegetable Shortening On The Glass Pan
Glass pans, which are sometimes known as Pyrex pans, are best used for bake and serving. If done right, the glass pan is the most ideal pan that you can use in your everyday baking ordeals.
The most commonly used item for baking is butter. This, however, is strictly based on preference. If you prefer not to use butter, there are many other items to use. This is why I included the option of using Ghee or vegetable shortening for this first step of the greasing process.
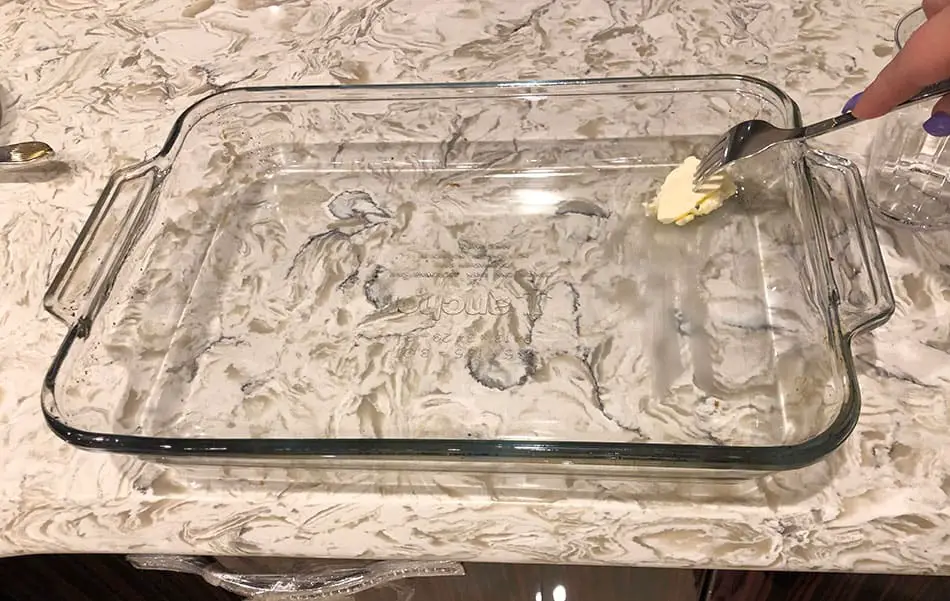
Once you get your greasing item of choice you’re ready to begin. Whatever item you decide to use, the steps for greasing are mostly the same.
- Cut a small cube of butter to use
- Rub the butter on the fingers tips of both hands
- Start rubbing your fingertips all over the glass pan
- Keep reapplying butter onto your fingertips
- Grease the sides of the glass pan thoroughly as well
- Make sure that there aren’t any clumps of butter
- Smooth it out until the glass pan is almost see-through again
Whatever item you use, make sure that it is not melted when applying it onto the glass pan. If you apply it on while it is melting, it will not stick onto the surface of the glass pan.
An exception to using melted butter is if you’re whipping up a delicious cobbler. Cobbler is usually baked in a glass pan to help evenly cook the fruit. This unique dessert places fruit, such as apples, on the bottom while your batter is poured on top. Melting butter and using that as your greasing method helps your fruit cook through as well as prevents them from sticking to the pan.
Make sure that your greased glass pan doesn’t sit out for too long as well. The buttered grease has to be fully stuck and committed to the baking process. I usually prepare all the baking ingredients ahead of time to be able to get the glass cake in the oven with the batter as quickly as possible.
If you’re a beginner and it takes you longer to bake, I recommend cooling down the glass pan in the fridge for 10 minutes before beginning this step. This will give you more time for the greasing process and can save you from redoing this step again.
Put Flour On Your Greased Glass Pan
Flour is universally known to be used for almost every aspect of baking. Who would have thought that it can be used for greasing your glass pan as well?
Depending on if you like using flour in your baking, some people don’t, putting flour on baking pans has many benefits to it. Flour creates a thin, much-needed barrier between the grease of the butter and the actual cake batter is used. Flour holds the grease on the glass pan strong so that it doesn’t melt into the cake batter.
Here are the steps for adding in flour:
- Create an easy to clean working environment because flour can cause a mess
- Pour enough flour inside the glass pan to cover the bottom (Don’t be afraid to pour more than necessary)
- Pick up the glass pan and start tapping the bottom of the pan to spread out the flour across the grease
- Once the bottom of the pan is coated, turn the pan to one side and tap the sides while turning it for the flour to spread on the walls of the pan
- Once the glass pan is fully coated with flour, turn the pan upside down over an empty container and tap the bottom of the pan so that the excess flour falls out
After doing this, your glass pan should look like it’s lined with a very thin line of flour. This happens because the flour sticks to the thin line of grease that you applied before doing this step.
This method shouldn’t always be applied. Flouring of the pan shouldn’t be applied when you’re creating a delicate, light, and fluffy dessert like the cheesecake. However, while creating a dessert like brownies, this method works great. The flour creates a chewy crust around the batter which is not suited for all desserts.
Use Parchment Paper On Top
Parchment paper is everyone’s go-to item in an everyday baking kitchen. It is almost always used to line every type of pan. The glass pan, however, is a unique creation. Putting parchment paper on a naked glass pan will never work.
Glass baking pans are much more slippery than other pans. This makes it very troublesome to try to use parchment paper alone. For me, it almost always moved while I poured the batter and gave me a big headache.
After applying the above-mentioned steps, the parchment paper is used strictly as a contingency plan or a “plan B”.
- Take a large sheet of parchment paper
- Cut it to fit the bottom of the glass pan only (the sides of the pan can’t have parchment paper on them)
- Put the parchment paper in the pan
- Make sure you don’t slide it and remove the other layers of greasing previously applied
While this is a short step, it’s always good to have a backup plan. This 2-minute backup plan has saved me numerous times when trying to remove the desserts out of my glass pan.
I always had the old-fashioned parchment paper roll in my kitchen but I recently came across a Box of Heavy Duty Flat Parchment Paper Sheets that work great without trying to rip the perfect sheet which never seems to work out. These sheets come in different sizes to fit your pans! You can check out these parchment sheets on Amazon here!
To Summarize
Glass pans are a staple baking item in the common household. I tend to do most of my baking in glass pans because it gives a darker, browner crust on most of my goodies (it’s a secret weapon for my brownies!). But be mindful, when you’re baking a cake in a glass pan, it will produce a darker color compared to a cake that is baked in a metal pan.
A big plus is that glass is transparent! Being able to see the magic brewing in your pan is both fascinating and helpful. We don’t want anything to be undercooked so taking a quick peek won’t hurt anyone.
So remember, make sure you properly grease the glass pan before pouring it into your batter. This will ensure easy removal of your delicious baked goods as well as provide an irresistible texture to anything you make.
People Also Ask…
What is the oven temperature difference between a metal and a glass baking pan? Make sure to reduce the oven temperature while baking with glass pans by 25 degrees Fahrenheit lower than what the recipe gives. Glass pans take longer to heat up but hold their heat for longer compared to metal pans.