
This post contains affiliate links.
I love making cupcakes. I’m often tasked with baking for various get-togethers and events, and cupcakes are a convenient way for me to provide dessert for a larger number of people.
Thanks to all of the experience I’ve had making cupcakes, I’ve learned with time more than a few ways to ensure that my cupcakes are moist and fluffy when they’re done baking.
And since I’m human and was a rookie baker at one point, I’ve also discovered many ways to fix cupcakes when they come out of the oven in a less-than-ideal state, especially if their flaw is that they’re dry.
While the lessons I’ve learned while baking came at the cost of some blunders and frustrations, I’m glad that I can now help you fix and avoid making the same mistakes that I did!
5 Reasons Why Your cupcakes turned out dry
Why did my cupcakes turn out dry?
As a whole, cupcakes are dry when mistakes are made with your batter or when they’re baked for too long. Common mistakes that can occur when preparing cupcake batter include not whipping enough air into your butter or over-mixing your ingredients. Overbaking can also contribute to dry cupcakes.
I’ve had my fair share of failed cupcakes throughout the first few years of my baking journey and are the reasons why:
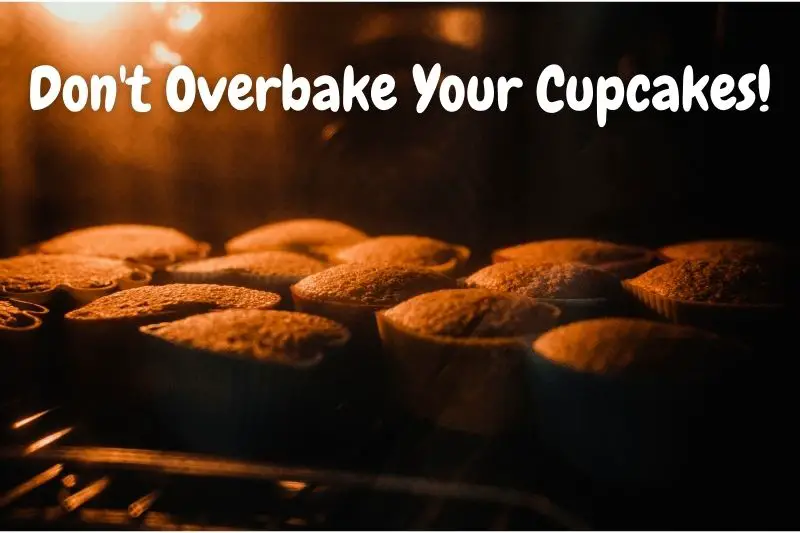
1. You Over-Baked Them
Generally speaking, cupcakes may be dry because you over-baked them. If you rely on just inserting a toothpick to know when your cupcakes are done, you can make them dry if you bake them until the toothpick is completely clean. Fully-baked moist cupcakes may still have a few crumbs on the toothpick.
Over-baking my cupcakes is something I did regularly when I was first starting to bake because I was relying on the toothpick method to know when they were done.
While this method is helpful, when done incorrectly, it leads to some ruined treats.
It’s commonly said that fully-baked goods will have a clean toothpick when this method is used, and that is correct, but what should really be said is that fully-baked and dry treats will have a toothpick that’s clean.
*By the way, I consider decorating my cupcakes correctly to be the most important step to presenting a perfect-looking cupcake. I recently came across a Full Set of Cupcake Decorating Kit that has everything you need to decorate your cupcakes! You can check out this set on Amazon!
In actuality, when baking your treats and they’re moist, fully-baked goods will commonly still have a few moist crumbs on the toothpick, and this is actually good!
That’s not to say that every cupcake with a clean toothpick is dry but rather to say that most, if not every, dry cupcake will have a toothpick that is clean.
Instead, when checking the status of your cupcakes, it’s best to rely on more than one method. I recommend gently pressing them. If your cupcakes are fully-baked and they are moist, then they should spring back immediately after you remove your finger.
2. Your Oven Temperature is Incorrect
As a whole, most ovens in residential homes aren’t set properly. It’s common for them to be hotter or cooler than the temperature they are displaying. This fact can lead to your cupcakes baking improperly and yielding dry results. You can help prevent this issue by using an oven thermometer.
Because residential ovens have trouble staying at or reaching the temperatures you set them at, when baking, you can end up with treats that are over-baked and dry.
Using an oven thermometer can help you keep track of your oven’s temperature so that you can adjust your baking time accordingly and prevent baking your cupcakes for too long.
You need to invest in an oven thermometer to judge the true temperature of the inside of your oven. This will help you get to know your oven better! I recently came across a great Stainless Steel Instant Read Oven Thermometer. You can check it out on Amazon!
Aside from your oven’s temp being inaccurate due to external factors, another reason why your cupcakes may be dry due to the oven’s temperature is that you caused the change in temp.
Whenever you open the oven door, you drop your oven’s temperature by a few degrees.
If you’re constantly opening your oven’s door in order to check on your cupcakes, then you’re making it so they aren’t baking properly and will need to bake longer.
This increases your chances of having dry cupcakes.
Instead, use your oven’s light to check on your cupcakes, and if your oven doesn’t have a light, then limit how often you check on your cupcakes to only one or at most two short times.
3. Your Butter Wasn’t Whipped or Creamed Enough
As a general rule, butter and sugar are creamed together to incorporate air into your butter that will help your cupcakes be light and fluffy. If your cupcakes are dry, it’s possible that you didn’t whip your butter properly. As a result, your batter will be denser and not form air pockets.
Whipping or creaming room-temperature butter together with sugar aids in making moist and fluffy cupcakes. If your butter is under-whipped, then it isn’t able to incorporate enough air to make your cupcakes perfect.
When creaming together butter and sugar, I recommend doing it with a mixer for at least 2 to 3 minutes for the best results.
When your butter and sugar are properly creamed together, your butter should be lighter in color and it should look almost like whipped cream or soft-serve ice cream.
While I like to do my mixing by hand, I much rather prefer using a Stand Mixer instead. I recently wrote an article that talks about the 3 Best Stand Mixers that bakers can buy in each stage of their baking journey. After reviewing a few stand mixers, the Best Overall Mixer was the KitchenAid Artisan Tilt-Head Stand Mixer. You can check out this stand mixer on Amazon!
4. You Over-Mixed Your Ingredients
Generally speaking, over-mixing your batter can lead to dry and dense cupcakes. Once your butter is light and fluffy, you should only mix your batter until your dry ingredients are just combined. Doing this prevents you from developing too much gluten into your batter and ruining your cupcakes.
When preparing your batter, it’s crucial that you only mix your ingredients until they are just combined.
If some pesky ingredients aren’t mixing in, then mix them by hand rather than with a mixer in order to prevent over-mixing your batter while you are trying to incorporate those last bits of ingredients.
Once I finish creaming my butter and sugar to the perfect texture, I add in the remaining ingredients and mixing until they’re fully incorporated, and not a minute more!
*Side Note: I recently wrote an article explaining Why Your Cupcakes Might Overflow & Sink while baking. In this article, I spoke about all the ways to fix and prevent sinking and overflowing cupcakes. You can check out this article here!
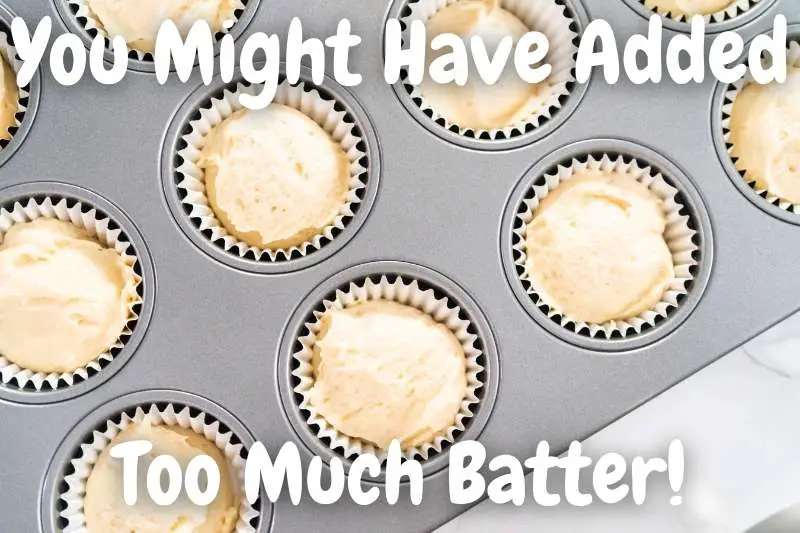
5. You Added Too Much Batter to Your Tins
As a general rule, the best results when making cupcakes are when you avoid overfilling the tins as they should be filled equally. If you fail to do this, your cupcakes are likely to overbake and be dry. You should leave about one-third of each muffin tin empty, giving room for your cupcakes to rise.
The more batter you add into each of your cupcake tins, the longer the batter in that tin has to bake. If you overfill your cupcake tins, then those overfilled tins will have to bake longer.
As a result, you’ll most likely yield dry and over-baked cupcakes or dense and under-baked cupcakes depending on how you respond to the dilemma.
Likewise, if you fill your cupcake tins unequally, then you are also likely to have bad cupcake results as some cupcakes will be dry and over-baked while others may be dense and under-baked.
For best results, you should fill each of your tins until about a third of each tin is left unfilled. This will also give enough room for your cupcakes to rise and not overflow over the sides.
*Side Note: I recently wrote an article about If Cupcakes Should Be Flat or Domed. This article discusses whether your cupcakes should come out flat or domed while baking. You can check out this article here!
4 Best Ways To Fix Dry Cupcakes
How to fix dry cupcakes?
Generally speaking, you can fix dry cupcakes by adding moisture back into them with creams, various types of milk, or syrups. Although adding moisture back into ready cupcakes is a difficult task, there are simple solutions that might help bring your dry cupcakes back to life.
I’ve had to course-correct my fair share of dry cupcakes, and these are some of the methods I’ve found to work best:
1. Add Simple Syrup
Simple syrup is equal parts sugar and water. You should bring it to a boil, and then let it simmer for a few minutes.
All of the sugar must dissolve, and you should cool the syrup completely before pouring it onto your cupcakes.
When your syrup is cold, poke holes into each of your cupcakes with a fork so that the syrup can travel into your cupcakes more thoroughly. Then, use a spoon to pour the syrup onto your cupcakes.
Your cupcakes will soak up the syrup quickly, but do not fret and rush to add more syrup. Instead, let your cupcakes sit for an additional 10-15 minutes before adding more syrup if they are still dry.
*By the way, I recently wrote an article about How Long Cupcakes Should Cool Before Frosting. This article talks about the right way to cool off a cupcake and how long you need to wait for it to cool. You can check out this article here!
2. Soak With Milk
To use this method to fix your dry cupcakes, treat your cupcakes like a tres leches cake and add milk (condensed or regular) to your cupcakes. I recommend boiling it first to prevent bacteria from spreading.
The milk should be cooled completely before you pour it onto your cupcakes.
If you use this option, you must eat the cupcakes within two days, and they must stay stored in the fridge at all times to prevent the milk from spoiling your cupcakes.
Therefore, if you’re making cupcakes for an event where you won’t have access to a fridge such as an outdoor picnic or cookout, then I don’t recommend using this method to moisten your dry cupcakes.
3. Serve With Ice Cream
If your cupcakes are dry, then you can serve them in a bowl with ice cream so that the ice cream can moisten your cupcakes as you eat them.
It’s a different and unconventional method but rest assured, it is absolutely delicious! Kids love them and they’re a great hit at birthday parties!
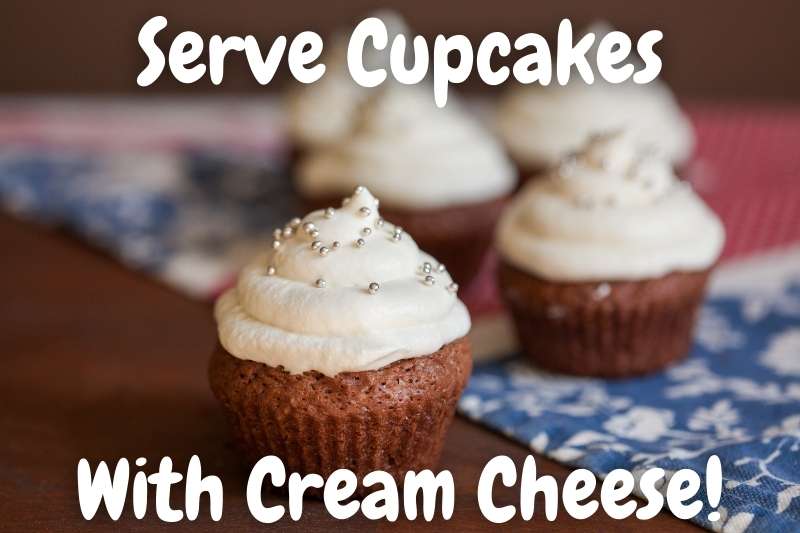
4. Add Extra Frosting or Whipped-Cream
To fix your dry cupcakes with frosting or whipped cream, cover the entire outer layer of your cupcake with frosting or whipped cream in order to prevent any areas of it from quickly drying further.
You can also fill the inside of your cupcakes with frosting or whipped cream for additional moisture.
To do so, add your frosting or whipped cream into a piping bag and stick the tip of it about an inch into your cupcake. If you’re going to use this method to add moisture to your cupcakes, be sure to fill the inside first before you start frosting the exterior of your cupcakes.
*Side Note: I recently wrote an article about How to Store Frosted Cupcakes to Keep Them Fresh. This article talks about the right way of storing frosted and unfrosted cupcakes in several different storage places. You can check out the full article here!
4 Reasons Why Your Cupcakes Are So Dense
Why are my cupcakes so dense?
As a whole, if your cupcakes are dense, then something likely went wrong with your batter. Your batter was either too liquidy or other ingredients weren’t measured properly and yielded less-than-ideal results. To prevent this, it’s best to use the right tools for baking when making your batter.
There are many reasons why your cupcakes may be dense. Here are a few of them:
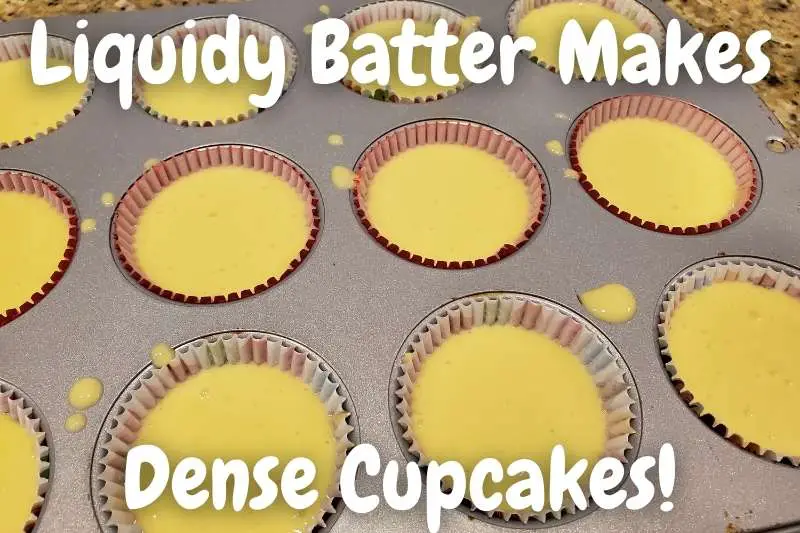
1. Your Batter Was Too Liquidy
One of the most common causes for cupcakes that are too dense is having too much liquid in your batter. To prevent this, measuring your ingredients the right way is imperative.
To ensure your ingredients are measured properly, it’s critical that you use the correct tools. For liquid ingredients, you should use measuring cups that are designed specifically for wet ingredients.
These measuring cups typically have handles and measuring lines on them to make pouring and measuring your wet ingredients easier.
Measuring cups for dry ingredients, however, are typically designed so that you can level off your dry ingredients in order to measure them.
These measuring cups aren’t ideal to rely on by themselves though when measuring dry ingredients.
I recommend also using a scale to weigh your dry ingredients for more security in the fact that you’re using the right amount of ingredients in your batter.
I avoid all of these issues by simply using a Digital Scale which is a lifesaver in my kitchen. I recommend using a Nicewell Digital Food Scale which runs on batteries making it a wireless, hassle-free option. You can find it on Amazon!
2. You Used Too Much Baking Powder or Baking Soda
If you use too much baking powder or baking soda in your batter, then what will happen is your cupcakes will rise, but then they will collapse and be dense.
This may seem counterintuitive since leavening agents give baked goods their rise, but as the saying goes, too much of a good thing isn’t always good.
What happens is that with too much baking powder or baking soda, your cupcakes will rise way too rapidly and collapse! When this happens, any moisture you had will evaporate and leave behind a dense, hard cupcake.
3. Your Batter Had Too Little Baking Powder or Baking Soda
Just like having too much baking powder or baking soda in your batter can yield bad results, so too can having too little of these leavening agents.
If you used the right amounts of these ingredients in your batter, but your cupcakes still came out dense, then I recommend checking to see that your baking powder or baking soda isn’t expired.
You can test these ingredients by mixing the baking powder into warm water or baking soda into white vinegar. If they are still good, then you should see some fizzing or bubbles.
4. You Didn’t Use Enough Sugar
If you try to make your cupcakes healthier by using less sugar in a recipe that wasn’t specifically made for it, then your cupcakes could be dense for that reason.
Sugar doesn’t just add sweetness to baked treats, it’s also important for helping with their structure. If your cupcakes are dense and you removed sugar from the recipe, then this may be the reason for your results.
Baking is often looked at as a science for a lot of reasons, including this very one.
When you have a batter that includes flour and eggs, you naturally have protein in the batter. When you add sugar, it causes those proteins to have weaker bonds, thus forming that delicate and soft texture we love in desserts.
Omit sugar and you’ll see your cupcakes turn dense as a rock!
*Side Note: You might also want to know How To Stop Cupcake & Muffin Liners From Folding In and Sticking. I recently wrote an article that explains How To Keep The Liners Looking Good When Baking In Them, which you can check out here!